

Everyone has a hard time drawing hands. They’re a very difficult shape to wrap your head around, and it’s a good idea to use reference for them whenever you can. Luckily you’ve got one on the end of either arm! But it still helps a lot to know a thing or two about them.
As with the rest of the figure, the best place to start is with basic shapes and anatomy.
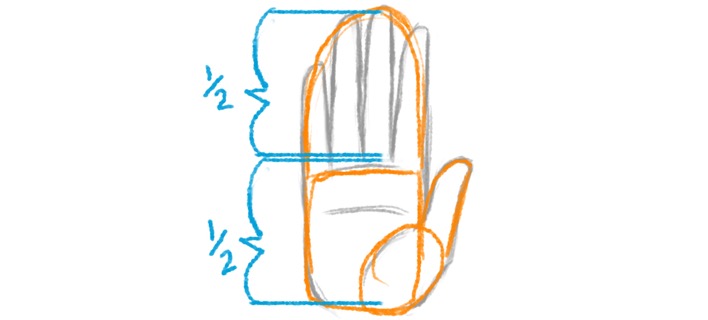
At the simplest level the hand can be broken up into the fingers, the palm and the thumb. The fingers and the palm are about the same length, so each take up about half the length of the hand.
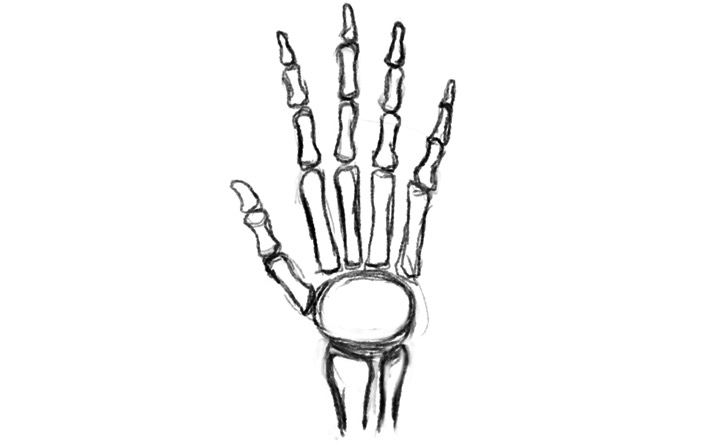
The bone structure of the hand looks something like this:
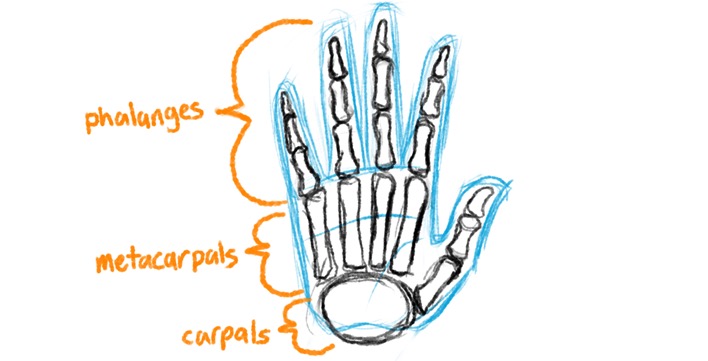
The blob at the bottom is actually a mass of small bones called the carpals, but for our purposes we’ll just be looking at the basic shape they make: the metacarpals and phalanges are what we care about most. The metacarpals and phalanges are those long lines of small bones that lead through the palm and out to create the fingers. They give the hand an amazing range of motion, not only in the fingers, but even a little in the palm! Touch your pinky to your thumb and you’ll notice that your palm can curl. It’s sort of like a bamboo mat.
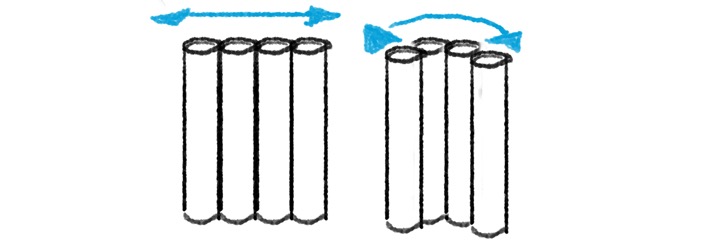
However, unlike a bamboo mat, the metacarpals and phalanges don’t just line up nice and straight side by side; instead, they radiate out from the carpals. This, plus their different lengths/sizes, gives the hand a definite curve to its shape, right down to where the joints fall.
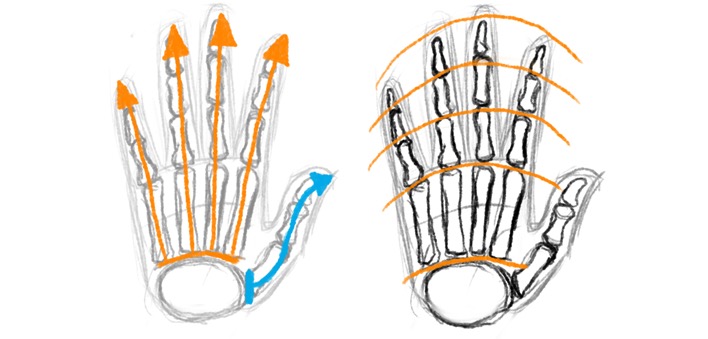
The thumb, however, doesn’t really follow the same pattern. It comes out at a remarkably different angle than the fingers, and its three bones give it a sort of “S” curve.
Both the curve of the fingers and the curve in the thumb manifest themselves often when the hand is posed, and are very important to keep in mind; otherwise the hand looks unnatural and stiff.
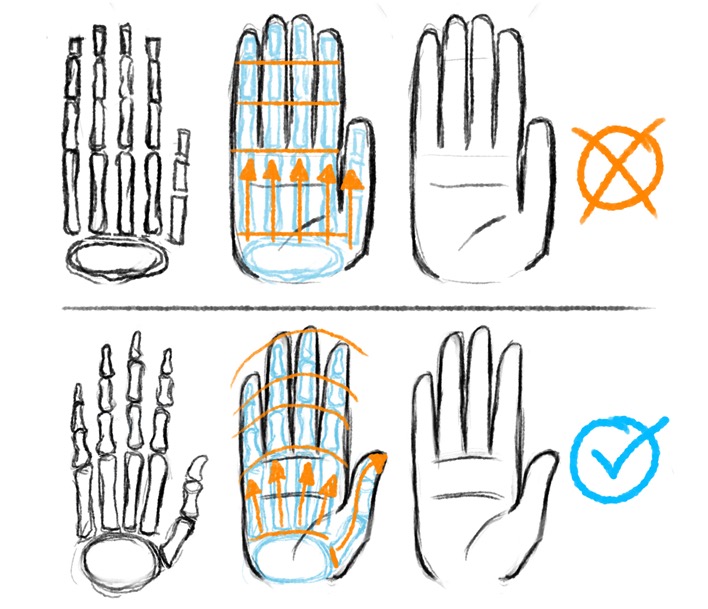
Also notice how each bone in the fingers not only gets shorter, but also thinner than the one before it; this gives the finger a nice tapered shape.

Exaggerating this taper can make the hand look more elegant, if that’s what you’re looking for.
Now that we’ve got the bones down, let’s put some flesh on ‘em! The hand isn’t very fleshy over all. There’s barely any flesh on the fingers or the back of the hand, and because of this, the knobby ends of the bones are pretty visible beneath the skin; these are the knuckles!
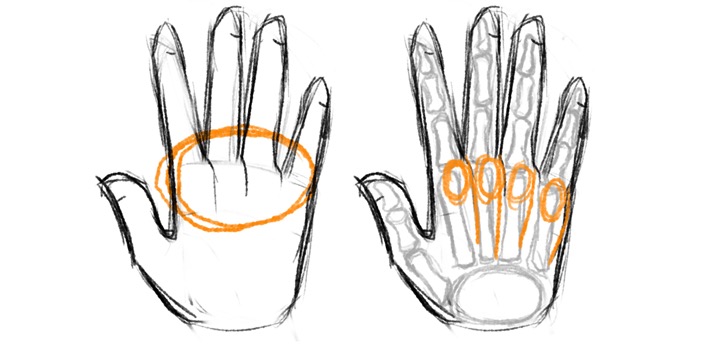
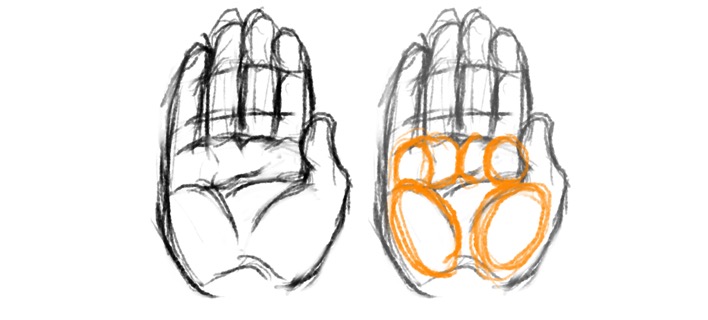
The palm has some fleshy spots, however, and they are crucial to the shape of the hand. This is where they fall in the structure:
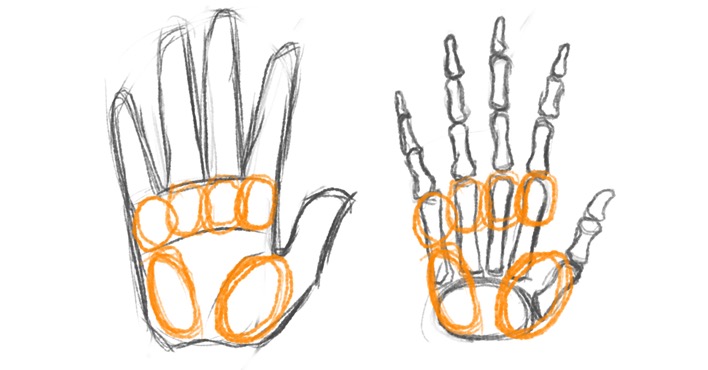
The end result is a shape something like a rectangular piece of memory foam after it’s been hit with a ball.
This is a good visualization for getting the basic shape, but it’s good to keep in mind where each of those pads are in relation to the bones and to each other because it can help you know what gets squished and creased as the hand moves.
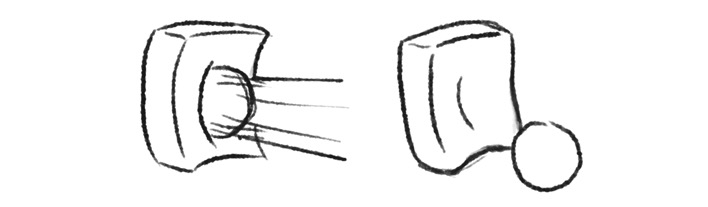
And last but definitely not least: the wrist!
The connection at the wrist is complicated. Here the two bones of the forearm meet the carpals at the base of the hand.
The result is that the hand (thankfully) never just looks like a glove stuck directly onto the end of a pole: the palm and the forearm are normally offset a little.
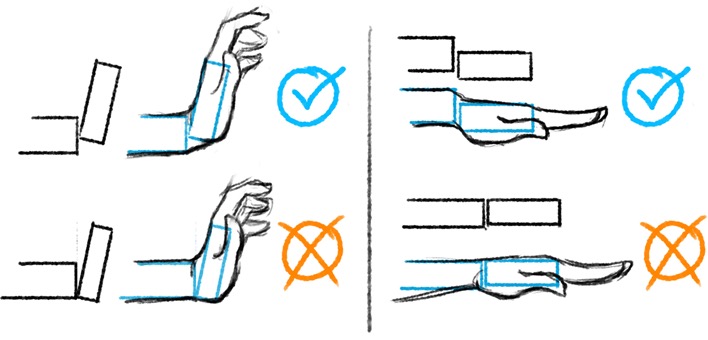
I’ve found observation from life/reference especially helpful on this one.
That's it for part one. In part two, we'll look at how we can use gesture to bring a drawing to life.
As always, remember to practice, practice, practice! I promise it's fun!
Thanks for reading!