

Did you know artists have the power to move between dimensions? It’s true. All it takes is a pencil and little understanding of light and shadow.
By using shading, we can transfer a drawing from the flat, 2-dimensional world of paper to the rich, 3D reality we live in (or at least the illusion of it).
Indicating shadows and light sources help gives art the appearance of depth and form. Our eyes are used to seeing light and dark everywhere we look and will naturally search for those same patterns on paper.
I’ll do my best to outline the basics of shading along with practical examples below…
Basic Forms
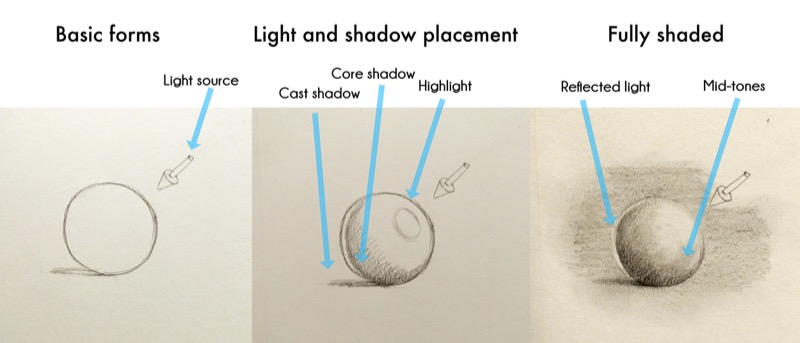
A good way to practice shading is to draw some simple shapes and think about how the light would hit them.
The process involves laying out your basic forms, then placing your light source and major shadows. For example, with a spherical object like this, the shadows will gradually fade away from the light.
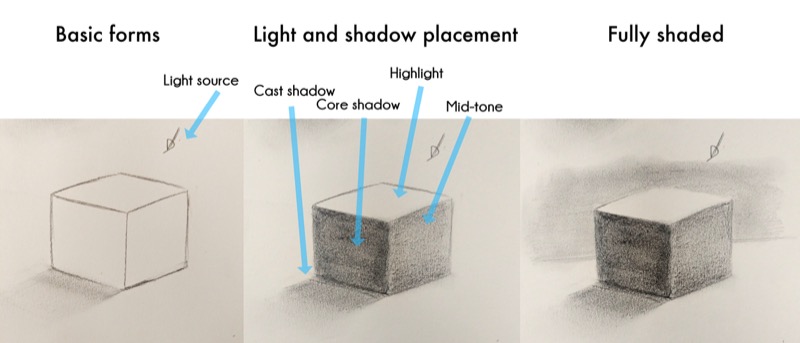
A cube is perhaps the easiest form to render because of its flat planes. Its three visible faces are made up of a shaded side, middletone side and light side. Add a cast shadow and boom - a cube!
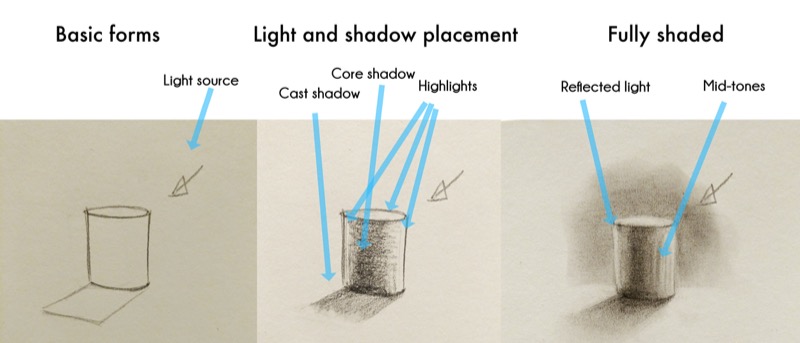
With this cylinder, the light is slightly behind the form. Because it’s a smooth, curving shape we’ll see some light wrap around both edges with the darkest core shadow in the middle.
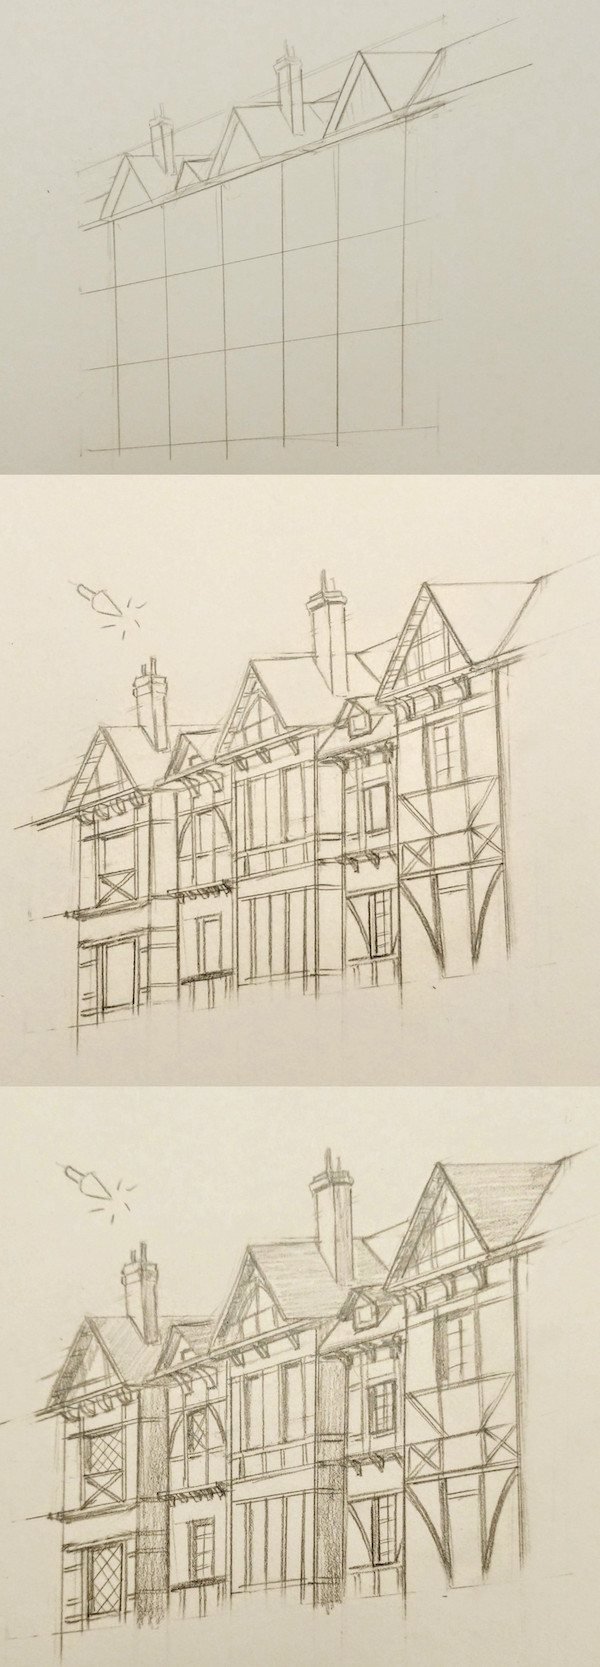
Complex forms
Now we’ll take a look at how these same principles apply when you’re working on a more detailed shape.
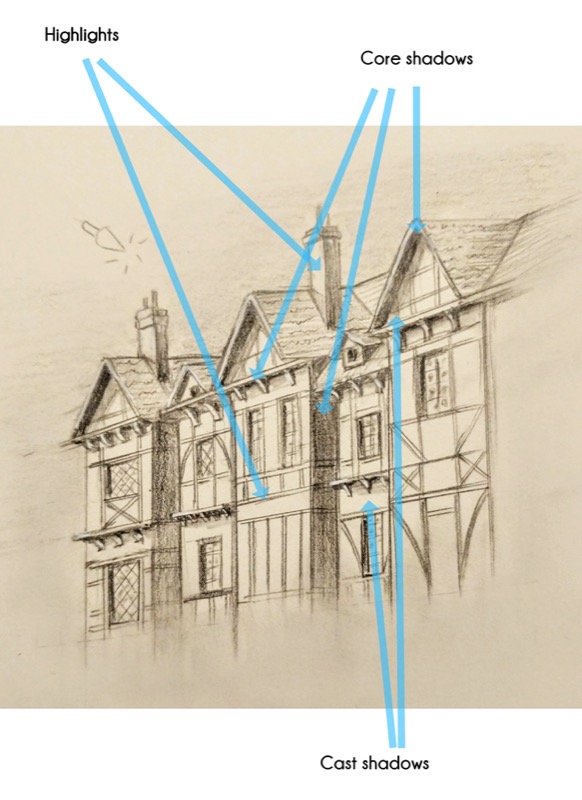
A building for example might seem complicated, but it’s actually just a large cube broken down into smaller segments.
As long as we know where the light source is, we can get a good sense of where the highlights, mid-tones and shadows will go too.
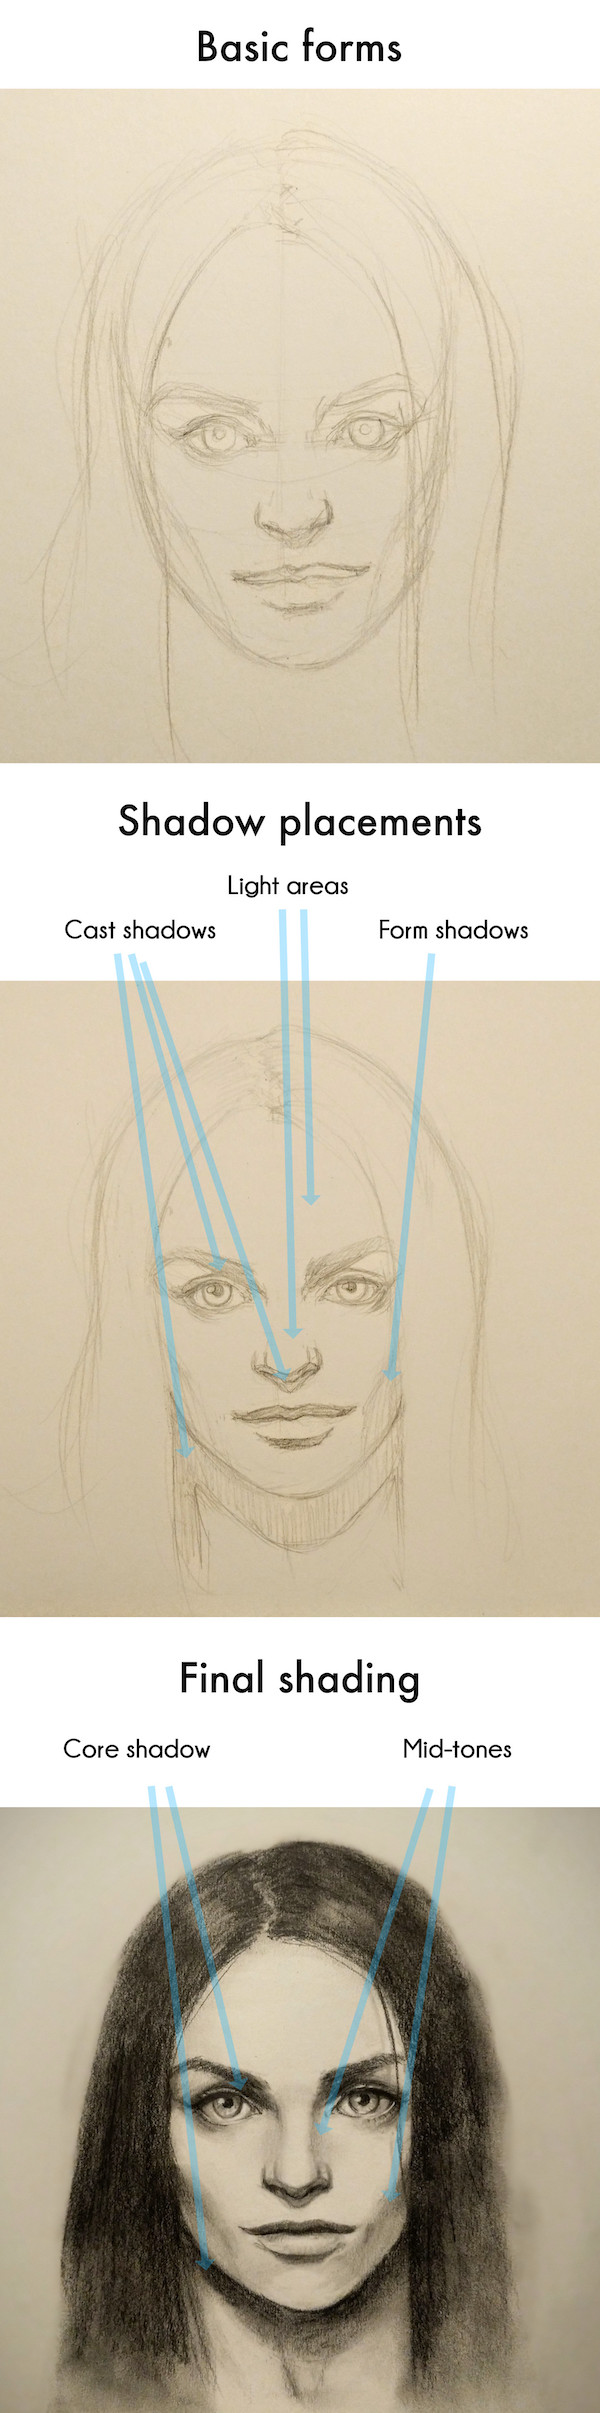
Shading faces
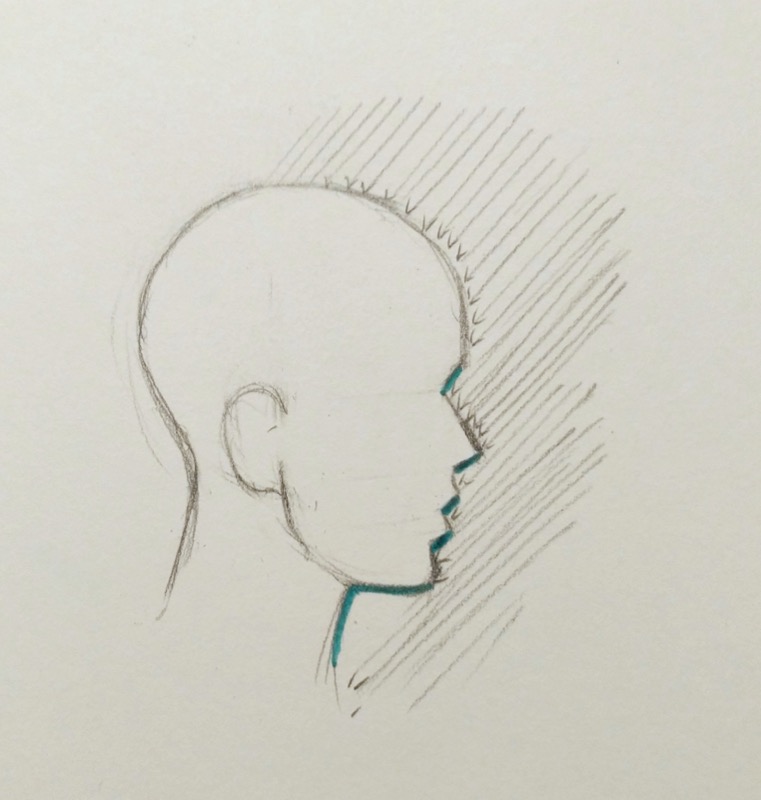
Human faces and other organic forms can be a little more unpredictable than our old pal the cube. The skull can be thought of as a spherical shape with a squared-off jaw attached to it. Again, once you pinpoint where your light source is, it’s easier to think about where the shadowswill fall.
While our goal is to draw a face from the front, it’s helpful to demonstrate where the shadows will be when viewed from the side.
If the light is falling like rain on the face, the dark areas will be the parts facing away from the light. Shapes like the nose, chin and brow-line can also cast a shadow on the face.
Switching our view to the front, we can now imagine how the geometry of the head will effect the path of light. Once the features are penciled in we can start blocking in the shadows and smooth things out from there, increasing contrast as we go.
I hope this brief guide proves useful to anyone looking to bring a new dimension of shading into their art. As we end, here are three things to keep in mind:
- Define your light source
- Use dark shadows, mid-tones and highlights
- Break shapes down into simpler building blocks And remember, sketch every day!