

Hello, Sketch a Day Community! Thank you for checking out my tutorial. There are two parts, the text version below with notes, and a video version.
In the video portion, I briefly discuss painting surfaces and demonstrate how to use the palette knives before diving into the painting, which has voiceover notes.
Tap here if you’d like to see the hour+ painting video
Before you start
First I want to mention that you must be careful with palette knives and that an adult must be present while using them. Palette knives come in plastic and metal versions, I prefer the metal ones but both can be dangerous if not used with caution.
Also, if you are using oil paint be sure to have an adult present and have adequate ventilation as some of the mediums have a strong odor.
Materials
For this tutorial, I am using ‘canvas paper,’ which is a great material to practice and learn on, as well as trying out ideas for larger paintings.
If you want to try this for yourself, here are some links to buy the material you will need:
Reference imagery
Here is the reference photo that I am using, which I downloaded (royalty-free) from Pixabay

I am using elements from this photo, but I do not use reference photos to dictate what my painting will become.
The process
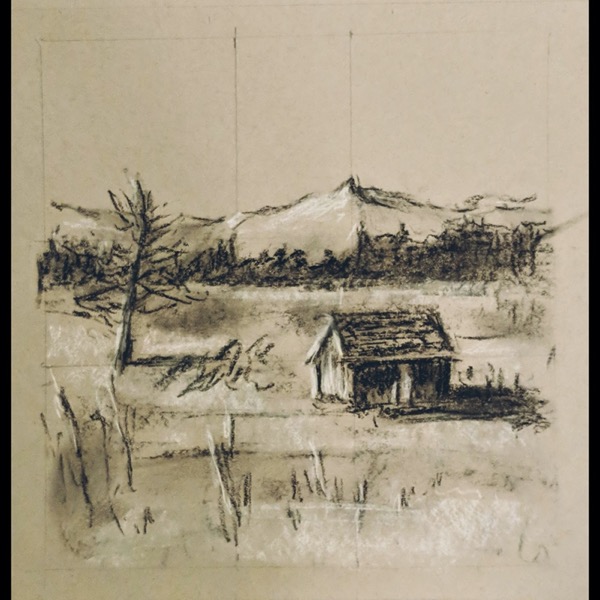
Taking ideas from the reference photo - here is the value sketch that I settled with for this painting. I like to spend 15 minutes or so drafting a value sketch to solve problems, place key features, decide on highlights and shadows, etc.
If you notice the pencil lines - those are based on the ‘Golden Ratio,’ 1.618… This is also known as the ‘Golden Section,’ the ‘Golden Mean,’ as well as other names.
Anyways several artists have used this ratio for centuries in their artistic compositions. I like to use it to place key features on these lines or intersection points. If you’d like to learn more - Andrew Tischler has a great video on YouTube about it.
So, I placed the bottom of the barn on one of the intersections, the highest mountain peak on another line, and the tree line on another.
All in all, I feel like it creates an interesting image that is visually pleasing on a subconscious level.
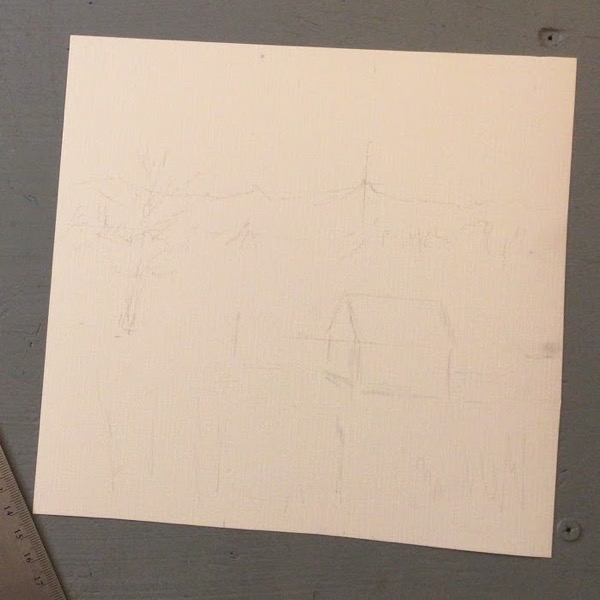
Next, I recreated a much simpler version of this sketch on the canvas paper. I do not labor over details on this stage because I find that I end up painting over the details and they do not help me after all. So instead, I place the anchor lines and shapes - and move forward from there.
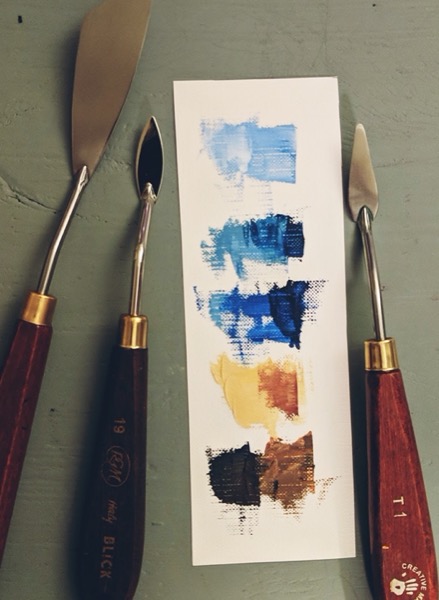
I decided to use a ‘complementary’ color palette of blue and orange. Below you will see the tinted out colors that I started with.
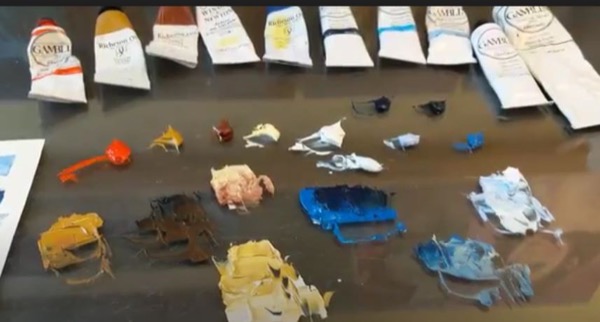
The beginning mixes of colors are shown below. I am careful to leave a range of colors with each mix - this is helpful when creating interesting blends. I used small amounts of Cadmium red light, yellow ochre, burnt sienna, Naples yellow light, Phthalo blue, Prussian blue, cerulean blue, radiant blue, cool white, and titanium white.
It is unnecessary to have all of these colors, I just like to work with a range of colors - so definitely use whatever you have :)
For this painting, I am not using any mediums, and am working ‘wet in wet,’ or alla-prima. The canvas paper does soak some of the moisture up - but still, I am careful to not use too much paint at a time to avoid graying out colors when I didn’t want that effect.
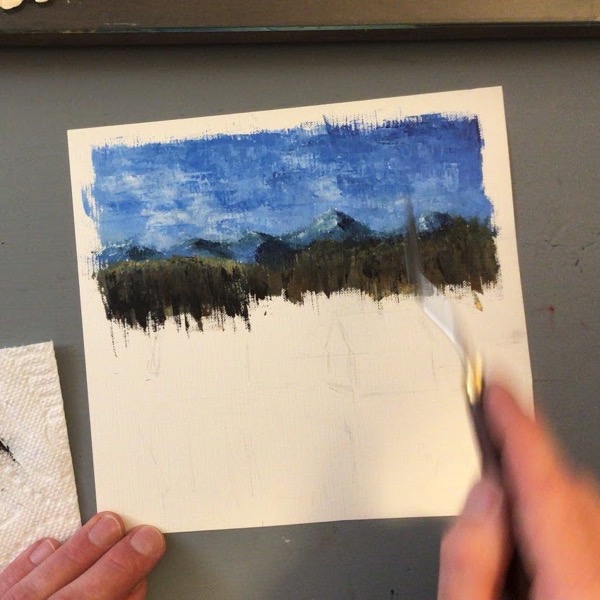
I start paintings out with the background elements and work forward. Starting with the sky I used the T1 palette knife and mixes of light blue and some mid-range blues to work in some movement in the sky that I like. Just under the sky are the distant mountain peaks which are lighter tonal values than elements in the foreground. You will notice the left side of the mountains have highlights and the right-hand side of the mountains have some darker values. I also used a scumbling technique to blur the sky with the mountains.

The tree line was painted next, with a range of lighter and darker browns. I used the T1 knife with vertical movements to help create the illusion of trees. I am not trying to recreate exact details but more so the impression of trees.
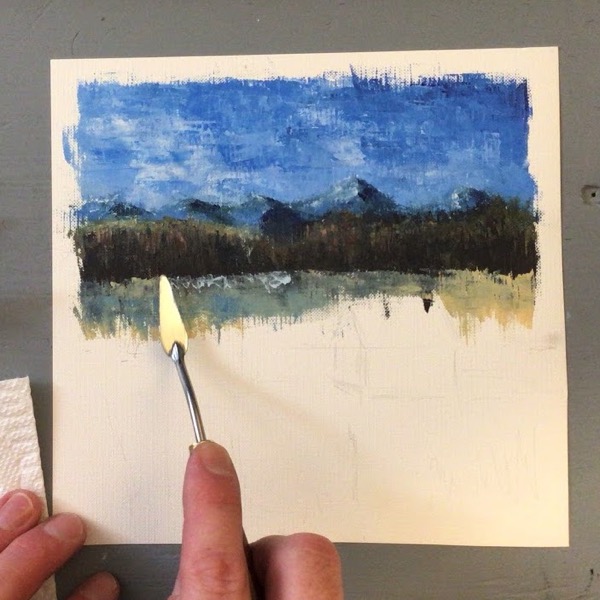
In front of the tree line is an area of frosted shrubs and smaller trees. I am using a lighter blue and a lighter yellow to create this boundary, which transitions to the foreground field. I am careful to pay attention to the balance of color in the whole painting at this point as more elements are created. I am using the knife in a similar way to create blends similar to those in the sky.
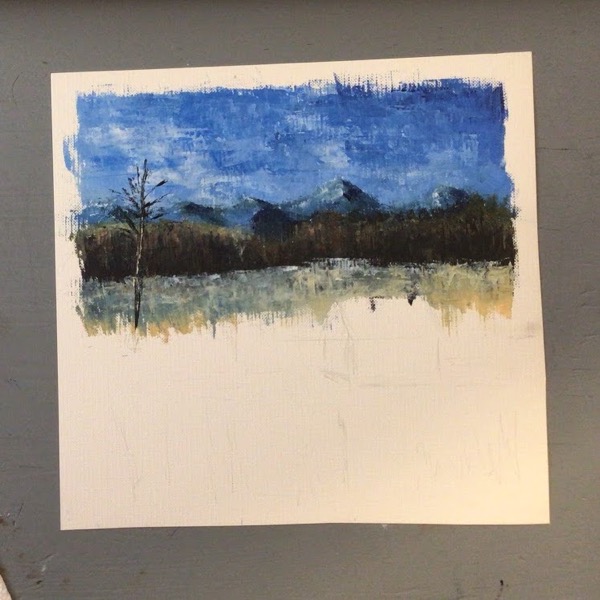
You will see the tree in the left side of the painting, which I placed strategically at a subdivision of the golden ratio...anyways, I used some darker values of brown and the edge of the T1 knife to create the right-hand side of the tree. On the left-hand side I created some highlight values to indicate bark and early morning sunlight.
Next, I used a larger knife to block in the foreground field which has some patches of snow and dead grass that breaks through. The color I used contained mainly Naples yellow light and yellow ochre, and a little bit of burnt sienna...which all worked together to create subtle movements of color. Then, going back over these areas with the T1 knife, I created some horizontal marks - lightly - to indicate some shaded regions, grassy areas, etc. I used the profile of the larger angled knife to place some taller dead grass in the foreground. This color is mainly burnt sienna and a little Prussian blue used to darken it in a bit.
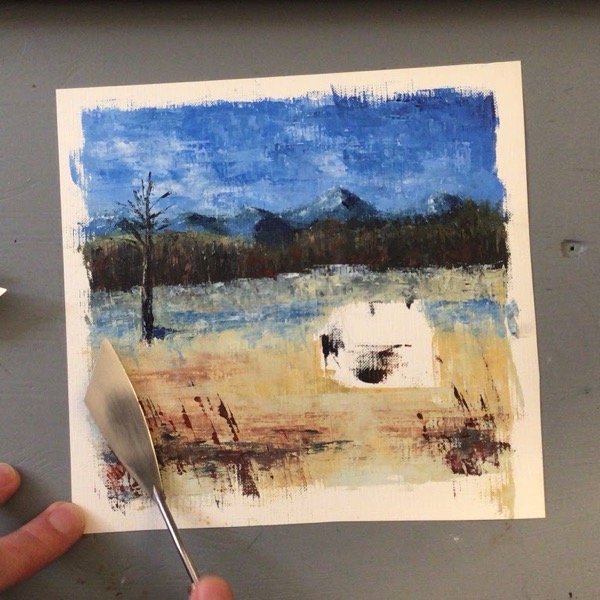
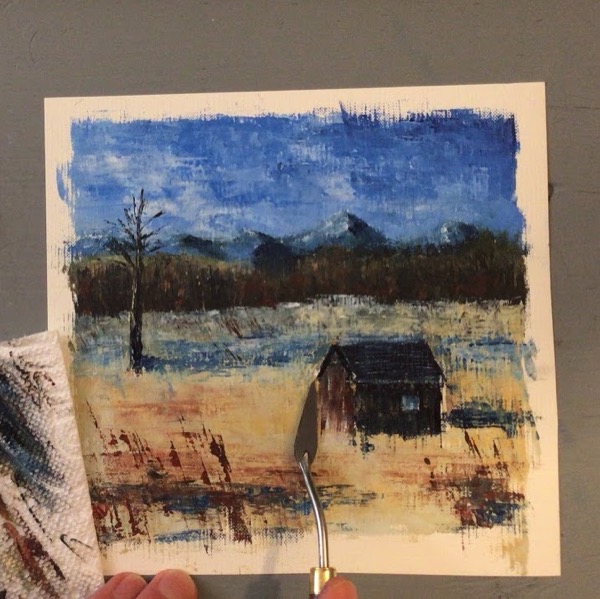
For the cabin, I used some lighter yellow values and intermixed them with some darker burnt sienna values. On the right-hand side of the cabin I used some Prussian blue to mix in and darken up the side that is not receiving the light. The window provides a nice contrast on this side and is reflecting a light blue value.
For the roof, I used the same techniques I described for the left-hand side of the cabin. The only difference is that the knife was held horizontally. Then I used some dark blue values to place shadows for the tree and the cabin. Definitely take a break and come back with fresh eyes to look for areas to revisit, tweak, adjust, etc. And, don’t forget to sign your masterpiece!
Learn more
If you enjoyed this tutorial you may also enjoy the resources below that I created to help people develop their palette knife painting skills!
Palette Knife Art : An introduction and Starting point Amazon Kindle Book
How to Paint with a Palette Knife: 12 Step by Step Painting Demonstrations by Amazon.com